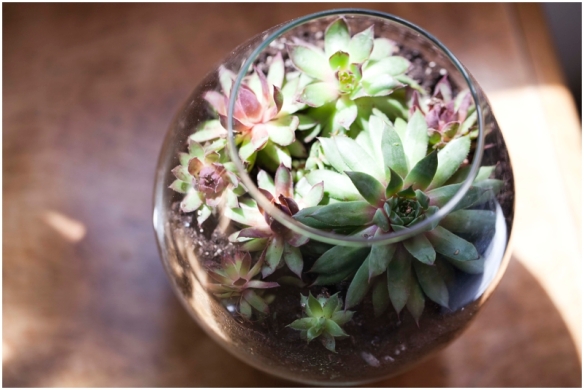
Here is an update on my latest DIY project. And actually NO I didn’t find this on pinterest! Although I am sure there are lots of great tutorials on there for terrariums. I got the inspiration from one of my daily blog reads Thrifty Decor Chic. Her blog is a great resource for home decor and design.
Apothecary Jar Terrarium HOW TO:
Supplies needed: Apothecary Jar (or mason jar would be cute too) small rocks, potting soil, and succulents of your choice (these are hen and chicks because that is all I could find)
Step 1: Layer the bottom the the jar with small rocks (this allows a little drainage for the soil) I wish I would have put in more rocks so you could see them on the sides, the dirt pretty much filled in around mine.
Step 2: Fill the jar about 3/4 full of potting soil. I ended up mostly using the soil that came with the plant, as it was already moist.
Step 3: Take apart the pot of succulents, separating the roots of all separate plants, and arrange in the soil of the prepared jar.
Step 4: Press soil in around the succulents and spritz with water to get the dirt of edges and moisten plants.
And your DONE! These don’t need much water, once a week spritz should do it. I keep the lid off about half the time so it can breath.
I was lucky enough to find this jar at a thrift store for $3.99, and already had rocks and potting soil. So I only spent about $9.00 total once I bought the succulents. I want to try some in bigger and smaller jars too. I think this is just the cutest way to add a little decor and get some green growing!
Someone else try it and let me know how yours turns out!


